 For the icing (Note: Prepare the mixture for the icing before you start the cake as it will need time to chill):
340g (1.5 cups) unsalted butter
255g (9oz/1.5 cups of chips) good quality white chocolate (min 30% cocoa solids, do NOT use baking chocolate), finely chopped
2 tsp peppermint essence
Additional note: this only just makes enough cake to cover a 3 layer 6″ cake, you can make 1.5x the amount of icing if you are making a larger cake. This icing is quite fiddly to work with and softens quickly at room temperature. If you are not comfortable with icing layer cakes I recommend you use this icing recipe instead.
-
Prepare the icing mixture ahead of time as it will need to be chilled before whipping. Place butter and white chocolate in a large saucepan and melt over low heat, stirring regularly until smooth (the solids may separate but this is okay).
-
Remove from heat and cool for 10 minutes, then chill in the fridge until solid, about 2 hours. If you are impatient like me you can stick it in the freezer for about half an hour.
-
Prepare cake as per instructions below.
-
Before you are ready to decorate your cake, remove white chocolate mixture from fridge at least 30 mins ahead of time to allow it to soften slightly.
-
Place white chocolate mixture and peppermint essence in a large mixing bowl and beat on high with an electric mixer until very light and fluffy.
For the cake:
255g (9oz) butter, chopped
140g (5oz) white chocolate, chopped
370g (13oz/about 1 &3/4 cups) caster/granulated sugar
1 cup milk
225g (8oz/about 1 & 2/3 cups) plain/all-purpose flour
85g (3oz/about 2/3 cups) self-raising flour (can be replaced with an additional 2/3 cup plain flour plus 1 tsp baking powder)
1 tsp pure vanilla extract
2 eggs, lightly beaten
Optional: red food colouring (I used Americolor gel)
- Preheat oven to 170°C (340°F) (I set my fan-forced to 165°C), grease and line with baking paper three 15cm (6″, this is what I used) or 18cm (7″, will result in slightly thinner layers), or two 20cm (8″) round cake tins.
- Place butter, white chocolate, sugar and milk in a large saucepan. Stir over low heat until smooth.
- Set mixture aside for 15 minutes to allow it to cool.
- Whisk in flours, vanilla and eggs until just combined.
- Place about 1/3 of the batter in a separate bowl and add red food colouring.
- Pour small amounts of red and white batter into your prepared tins, ensuring there is an equal amount of batter in each tin. Use a butter knife to run through the batter once to help swirl the red and white batter around a bit. I placed my batter into two pouring jugs to make this part easier.
- Bake for about 50-60 minutes (longer if your cakes are thicker obviously), until a skewer inserted into the centre comes out just clean. If the tops of your cakes start to brown too early you can cover the tins loosely with foil.
- Cool on rack for 10 minutes and then carefully remove from tins and cool completely.
To assemble:
Variety of different sized and coloured candy canes
Red and white candy canes, crushed with a rolling pin
-
Once your cakes are completely cool and your icing is whipped, place one layer of cake on your cake stand or plate. Spread a layer of icing over the top using a spatula.
-
Sandwich with another layer of cake and repeat. Top with remaining cake layer.
-
Crumb coat the cake with some of the prepared icing and chill for about 30 mins.
-
Cover with a thicker layer of icing and smooth sides with an offset spatula. Running the spatula regularly under hot water will help to smooth the icing.
-
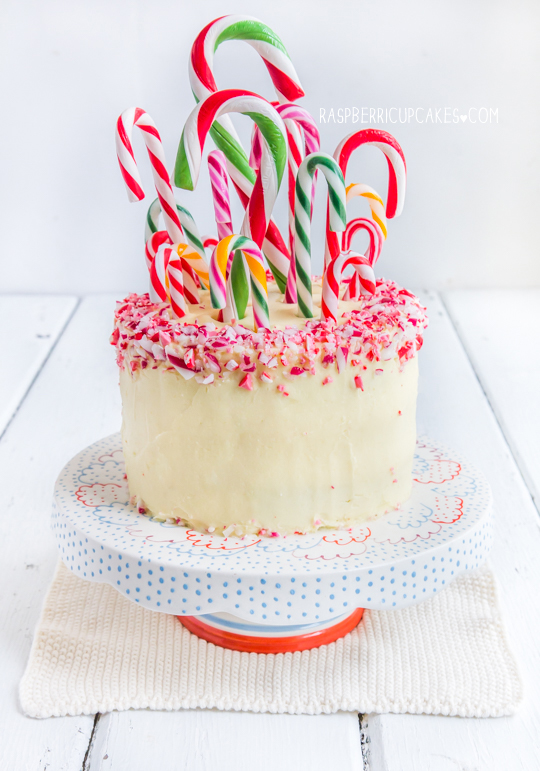
Chill cake again to allow icing to set. Decorate the edge of the cake with crushed candy canes. You can leave the cake as it is for something a bit simpler/elegant, or go nuts and top the cake with lots of different candy canes.
-
Chill cake to allow icing to set again. Remove from the fridge 30 mins before serving.
Source www.raspberricupcakes.com/2014/12/candy-cane-peppermint-and-white.html

 USD
USD  AUD
AUD  EUR
EUR  GBP
GBP 


